
Databases are perfect for storing data efficiently. There are many different databases, but in this post, I’ll talk specifically about MariaDB. Follow along and learn how to install MariaDB, create databases, and give users access to using them. I’ll also show you how to backup and restore your database.
Installation of MariaDB
I’ll be using Ubuntu 20.04, so you might have to install it another way if you’re using something else.
Let’s get on with it!
Open a terminal and run:sudo apt install mariadb-server
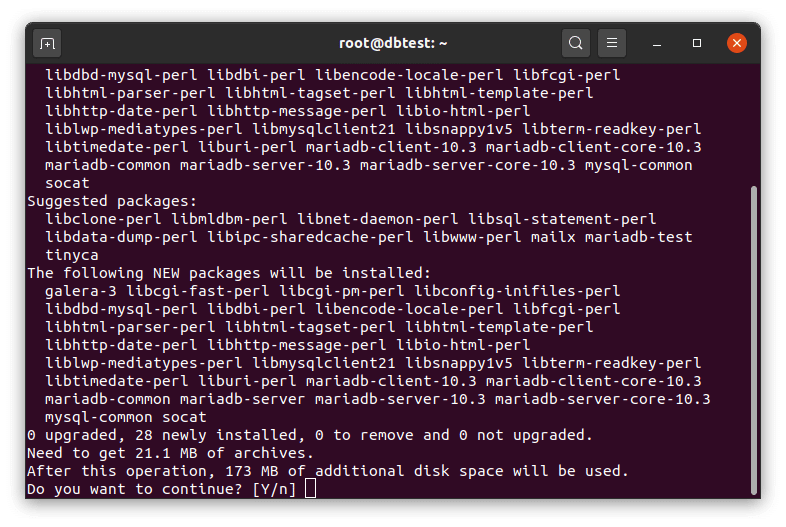
Congratulations, MariaDB is now installed! That was quick!
Create a MariaDB database
You can have multiple databases on one MariaDB installation. You might want to have one for your blog, and another one for the rest of your website. Let’s create a database called blog, but feel free to call it whatever you want.
In the terminal, run:sudo mysql
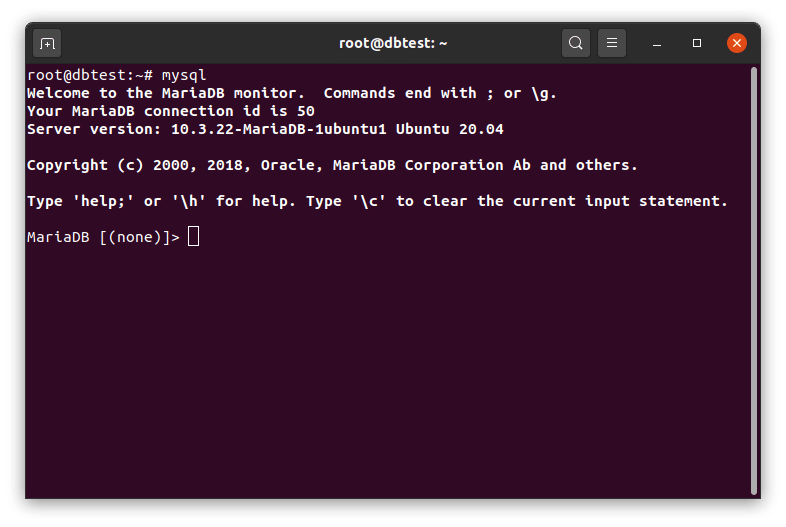
You’re now talking to MariaDB and can issue commands.
To create a database called blog, you just run the following:CREATE DATABASE blog;
Make sure the database was created by listing all existing databases:SHOW DATABASES;
Create a MariaDB user
You can have multiple users on one installation. Multiple users can be handy if you want a user with access to one specific database. You can also fine-tune permissions, like giving users read-only permissions on particular databases.
To create a user called alexskra, with the password secret, run:CREATE USER 'alexskra'@localhost IDENTIFIED BY 'secret';
Make sure the user was created by running:SELECT user FROM mysql.user;
Set permissions for MariaDB user
To give the user called alexskra access to the database called blog, run the following:GRANT ALL PRIVILEGES ON blog.* TO 'alexskra'@localhost;
For the changes to take effect, you need to run:FLUSH PRIVILEGES;
Done, you can now exit the MariaDB command prompt by typing exit!
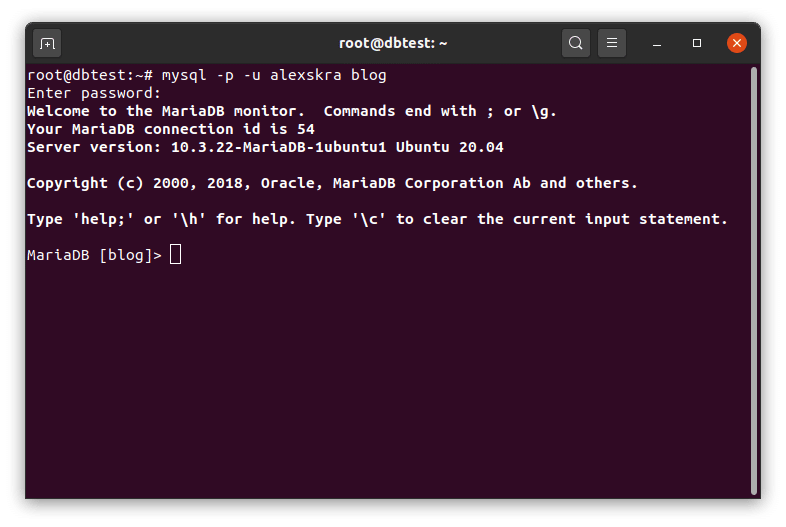
To make sure everything is working, let’s connect to the blog database as our new user:mysql -p -u alexskra blog
Backing up your database
Backups are important. If your server goes down, you want to be able to restore the data. Server failures or mistakes don’t happen often, but backups are there for you in case something goes wrong.
There are two different ways of backing up databases I tend to use. The first one is with the regular mysqldump tool, and the other is with mydumper.
Regular mysqldump is usually good enough, but it can be quite slow if you have a lot of data. Mydumper, on the other hand, can back up databases in parallel using multiple threads.

Backup using mysqldump
These examples are using alexskra as the username.
If you want to back up all databases, run:mysqldump -p -u alexskra -A > all.sql
If you want to back up a single database called blog, run:mysqldump -p -u alexskra blog > blog.sql
And if you want to back up a table called persons from a database called blog, run:mysqldump -p -u alexskra blog persons > persons.sql
You might want to compress the SQL file to reduce the file size so that it can be moved faster to other servers. You can do it in one go like this:mysqldump -p -u alexskra blog > blog.sql && tar -czvf blog.sql.tar.gz blog.sql
Backup using mydumper
Unlike mysqldump, mydumper doesn’t come with MariaDB, so you need to install it if this is what you want to use. Note that mydumper doesn’t seem to be working well with the included MariaDB version in Ubuntu 20.04, so use with caution:sudo apt install mydumper
Here is an example of how to use it to back up a database called blog and store it in a folder called kittens, using the user alexskra:mydumper -p -u alexskra -B blog -o kittens
You can then compress the folder using this:tar -czvf kittens.tar.gz kittens
Restoring your database from a backup
I’ll show you two different ways to restore your database. Which one you use depends on what you used to create the backup. If you created the backup with mysqldump, then you should use that. If you used mydumper, then you should use myloader.
Restore backup created with mysqldump
To restore a backup, you first need to decompress and unpack the file if it’s compressed:tar -xzvf blog.sql.tar.gz
Then, you can import it like this:mysql -p -u alexskra blog < blog.sql
Restore backup created with myloader
If you already have the myloader command, then you can follow along, if not, then you need to install the mydumper package as described here.
First, decompress the file:sudo tar -xzvf kittens.tar.gz
Then import it from the kittens‘ folder using the alexskra user:myloader -p -u alexskra -d kittens
Update table statistics
Many probably forget or don’t know that they most likely should update table statistics after importing tables. Failing to do so might leave your database thinking the cardinality is very low for your columns, which, in turn, can cause it not to use related indexes.
I’ve failed at this myself, and MariaDB scanned the whole table, resulting in long query times.
It’s easy to fix, and you can use the option that suits you best:
- Either run
ANALYZE TABLE <table>;for each table - or just restart the database.
Have fun with MariaDB! 😊